How to create a customer survey
With easyfeedback, you get a professional survey tool for creating, conducting and evaluating customer surveys across the entire spectrum of customer experience.

Solutions / Customer Survey / How to create a customer survey
Creating and conducting a customer survey is easily implemented.
In the following steps, we will show you how to design & set up a customer survey tailored to your goals, invite your customers and analyze the results.
1st step: Define goals and customer group

At the beginning, there is the objective of the customer survey:
What goal do you want to achieve with the survey?
The general satisfaction of the customers or in a specific area (customer care, service, delivery, etc.) Or do you want to determine wishes and needs?
If you have created the goal of the customer survey, the customer group that you want to survey is also derived directly from this:
Will all customers be surveyed or only a portion?
At what point in time within the customer experience should the survey take place?
In addition, the survey group also determines how the invitation should take place, for example, via print media such as flyers or checkout slips or digitally via the newsletter or social media.
2nd step: Conception of the questionnaire
Once the goal for the customer survey has been determined, the design of the questionnaire can begin.
The conception is primarily about selecting the right questions.

Tip:
With the free survey templates from easyfeedback, we provide you with a lot of ready-made questions.
Simply select one or more templates and be inspired by the questions asked there, or simply copy the questions from the templates into your survey.
When defining the questions, always keep the goal in mind.
If you want to determine satisfaction after a support contact, focus on questions that ask about the situation experienced there.
Or if you want to find out about the checkout process, ask specifically about how easy it was to complete the order.
Don’t mix up individual topics.
This will prevent the customer survey from becoming unnecessarily long and stretching the participant’s patience.
When formulating the questions and selecting the question type, first consider what statement you want to make with the answers. This determines the choice of question type and what the question should be.
Example: You would like to know whether there are problems in the checkout process or whether the process can be improved at a certain point.
In this case, you could choose an assessment question, with gradations of “agree” to “strongly disagree,” and ask about each step within the process:
– I was shown all the information I needed at all times.
– Customizing my billing address was easy.
– The range of payment options was sufficient.
– etc.
Proceed according to this scheme:
First think about what you want to know and then ask specifically about the individual points.
3rd step: Structure of the questionnaire
After designing the customer survey, the survey is created. To do this, log in to easyfeedback or create an account if you don’t have one yet.
Start with a blank survey or simply use one of our templates. If you start with a blank survey, you can also copy questions from other surveys/templates into your new survey.
Question by question, you then build the questionnaire and design the survey flow.

4th step: Corporate design: logo, colors & font
In addition to the content of the survey, the look and feel of the customer survey also counts.
If you present yourself as the sender, the participant’s trust in the survey increases.
To transfer the corporate design to the survey, simply open the layout configurator in easyfeedback and transfer your design elements to the survey: Logo, background image, colors and fonts.
5th step: Invite customers to the survey
After your survey has been built and tested, the next step is to place the survey or invite.
Which way you choose depends on who the target audience (participants) is for the customer survey.
If you want to invite your customer base with a more general survey via email, then you can use easyfeedback’s email invitation tool to send and invite the emails.

If you want to survey your customers/users after checkout or at any other random place on your website, then the survey will be embedded on your website.
We offer different options for this.
Or if you want to place the survey in your app or a newsletter, then simply copy the survey link and paste it in the respective position.
Which way you choose always depends on who you want to survey and where. We have different options for each way.
6th step: Monitor participation
With the sending of the invitations or if you position the link anywhere, you will very quickly see the first participations.
As a rule, you will receive immediate feedback and you can directly see the first results.
Monitor the progress of participation.
If you notice that the participation rate is falling, you can send a reminder (email invitations).
Or if the survey has been posted on social networks, it’s time to trigger the post again.
Again, where the survey was included is key.
If the customer survey was included at an “ongoing point”, then you don’t need to send a reminder.
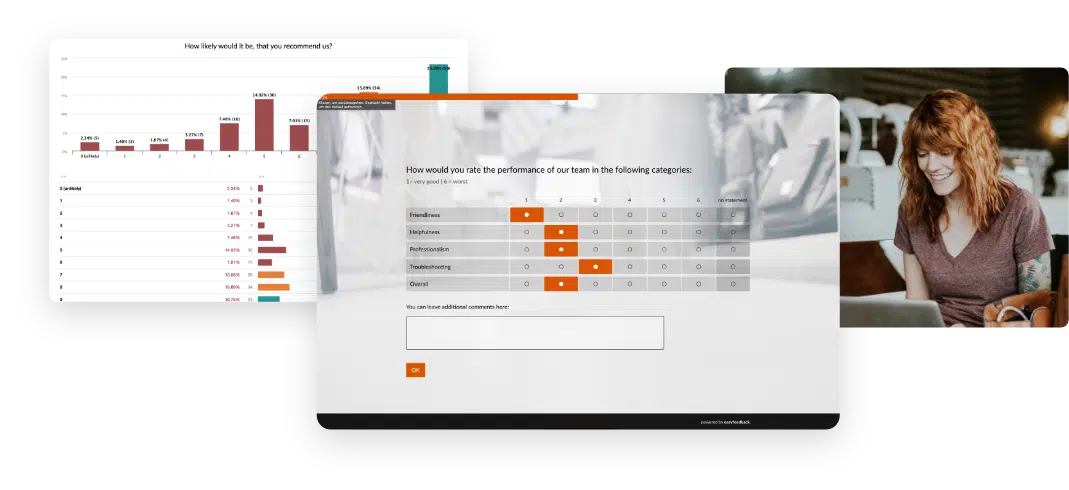
7th step: Analyze results
At the end of the survey comes the most exciting part: analyzing the results.
During the survey you have already seen results and waited for all your customers to give feedback.
Now comes the analysis of the results.
When analyzing, you should proceed as follows:
First, look at the overall results: Question by question, free text response by free text response.
Then start segmenting the overall result and looking at individual groups of participants. For example, the feedback from new customers or existing customers.
Segmentation is done by filtering the results. The criterion used for filtering is always different and depends on the questions.

If you have asked questions in the survey to segment the participants into groups, then use this as a criterion.
If you invited people to the survey via different URLs or visitor sources, then use this as a criterion.
Filtering the results gives you a great opportunity to look at the feedback from individual groups of people and draw conclusions from the relationship with the customer.
8th step: Derive recommendations for action
The goal of the survey is to discover potential for improvement at the end and to adjust your own business.
By looking at the overall result, you have gained a good overview.
By segmenting the results into individual participant groups, you can sharpen your focus and see more clearly where problems have arisen.
You derive recommendations for action by noting the negatively mentioned points per question or question topic and deriving countermeasures/improvements from this.
Depending on the number of participants and the scope of the survey, a lot of points can come together. Do not let this deter you.
First collect all points.
Then add duplicate items together and make a list.
Next, sort the list and move the actions where you can achieve change the fastest to the top.
Now you have a list of recommended actions that you can implement piece by piece.
Further information

