Raising employee awareness of data protection is a key component of corporate practice and legal requirements.
An interactive training quiz offers you an effective way to impart knowledge, check learning progress, and strengthen practical skills.
With easyfeedback, you can easily create a quiz that allows you to test knowledge and get direct feedback from participants.
This step-by-step guide takes you systematically through the entire process: from setting up the quiz and creating suitable questions to evaluating and analyzing the results.
After completing this guide, you will have the necessary know-how to design a professional, targeted quiz that motivates your employees and promotes the secure handling of sensitive data.
Step 1: Create an account or log in
Go to “Create survey” at the top of the navigation bar. If you already have an account, click on “Login” instead.
When registering, enter your name, email address, and a password.
Then confirm your email address via the link you will receive by email.
Step 2: Create a new survey/quiz
Once you are logged in, you will be taken to the dashboard. Click on “Create new survey” to start a new quiz.
Give your survey a meaningful title that clearly describes its content, for example, “Training quiz: Data protection for employees.”
Step 3: Define the quiz structure
Once you have created the survey, define the structure of the quiz. First, decide how many questions you want to include. For a short test, 10 to 15 questions are usually sufficient.
Then decide whether the quiz will be anonymous or whether the names of the participants should be recorded.
Note: For data protection training courses that require participants to pass an exam, it is advisable to record the names of the participants. This allows you to document which employees have successfully completed the course.
You should also consider the design or layout of the quiz.
easyfeedback offers options such as colors, logos, or company branding, which give the quiz a professional appearance and promote participants’ identification with the company.
Step 4: Add questions
In the next step, you create the questions for your quiz. First, select the question types that best suit your quiz.
easyfeedback offers single-choice questions, where only one answer is correct, as well as multiple-choice questions, where several answers may be correct.

Be sure to formulate practical questions that reflect typical situations from everyday work.
An example could be:
“A colleague asks for customer data. What information are you allowed to disclose?”
Then mark the correct answer(s) so that easyfeedback can automatically evaluate the points.
Optionally, you can also add notes or short explanations that will be displayed to participants after they have answered.
This supports the learning process and helps to consolidate knowledge in the long term.
Step 5: Quiz settings
Once the questions have been created, it’s time to configure the quiz settings to define the process and evaluation.
First, you should activate the quiz function in the settings so that automatic evaluation, scoring, and feedback display are possible.
You can choose whether the evaluation is based on points or whether you simply want to mark the correct answer.
Both options are suitable for training courses – awarding points is particularly useful if you want to document whether a participant has passed, while displaying the correct answer is ideal for purely learning or practice purposes.
In the next step, you can specify the points awarded for each question in more detail.
Consider which questions are particularly important and should be given more weight if necessary. A clear distribution of points makes it easier to evaluate the quiz later and makes passing the quiz comprehensible.
In addition, easyfeedback offers the option of displaying direct feedback after each question is answered.
This allows participants to see immediately whether their answer was correct and also provides a brief explanation or hints as to why an answer is right or wrong. This immediate feedback supports the learning process in the long term and promotes understanding of the content.
You can also specify whether certain questions should be optional or mandatory.
The order of the questions can also be controlled, e.g., randomly or fixed. In this way, the quiz can be customized and specifically adapted to the learning objectives of the training.
Step 6: Conduct a test run
Before releasing the quiz to all participants, you should test it yourself or with a small test group.
This will allow you to identify any errors, unclear wording, or technical issues at an early stage.
Also check the automatic evaluation to ensure that all points are calculated correctly and that the feedback function works as intended.
A careful test run increases the quality of the quiz and ensures that participants have a smooth and educational experience.
Step 7: Publish the quiz
Once the quiz has been completed and tested, you can distribute it to participants via easyfeedback.
Our tool offers several convenient options for this: You can send a direct link via email, generate a QR code that participants can scan with their smartphones, or embed the quiz directly into internal platforms such as the intranet or Microsoft Teams.

It is important that all relevant employees have easy access to the quiz. Inform participants in good time about the start, duration, and purpose of the quiz to ensure that participation runs smoothly.
Clear communication and easy access ensure that as many employees as possible participate and that the quiz is used effectively as a training tool.
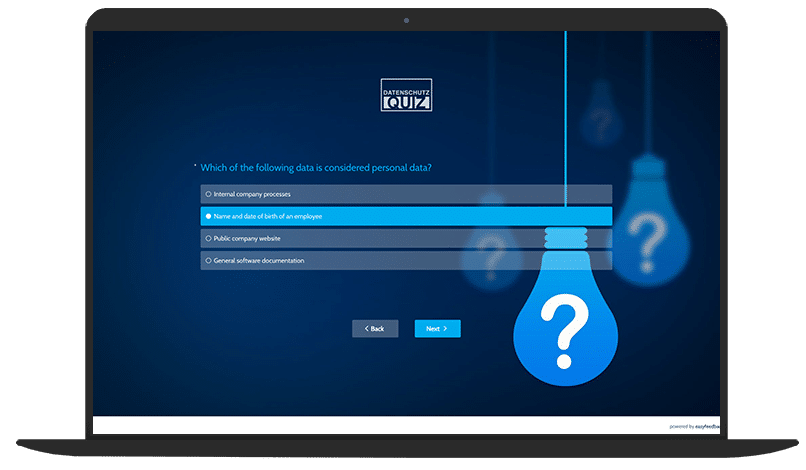
Sample quiz for data protection training
To give you an idea of how a training quiz with easyfeedback can be structured, here is an example with typical questions on the topic of data protection.
The quiz covers practical situations from everyday IT work that are designed to sensitize your employees to the correct handling of sensitive data.