Login
First we need to create the questionnaire. In order to do so, please log in to your account at easyfeedback. If you do not have an account yet, you can create one here:
Build questionnaire
Click on + Create new survey in the Overview,

select Start without template, assign a title for the survey e.g. “Update business cards” and click on Create survey.

After creating, the questionnaire editor opens with the new survey and you get three predefined pages:
- Welcome page
- 1st question page
- Final page
Welcome page
On the welcome page, it is a good idea to give employees a brief overview of the project. But not too detailed, as we will already go into more detail about the project in the later email invitation. An example greeting could be worded as follows:
Dear Employees,
from time to time your position in the company changes, your last name due to marriage or your telephone number.
This questionnaire allows you to review your professional information for your business card and make any necessary corrections. If no adjustments are necessary, please just click “Submit” at the end.
Thank you,
Your personnel department
Above the welcome text, you can still customize the title of the survey. In this case, the title could be as follows:
Your details for the new business cards

Question page
To redisplay and edit the existing data from the employee list in the survey, we use the Text response question type to update the business card data.
Click the green + button at the bottom of the 1st question page and select Question.
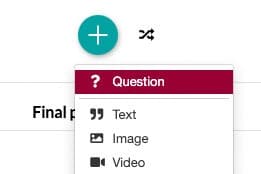
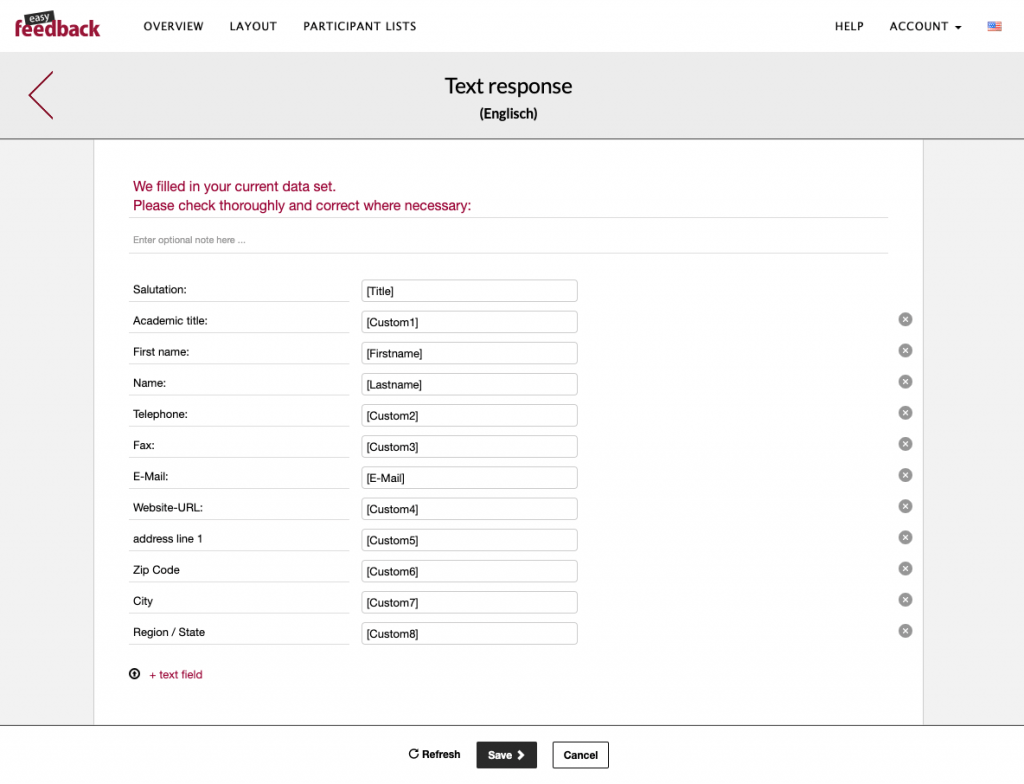
In the next window, select the “Text response” question type, which will take you to the question editing mode. At this point you can now build the query for the business card data:
To prevent spelling errors, we can now still validate the text fields individually. However, you should keep in mind that a last name, for example, can be longer. Therefore, you should not limit the queries too much. The information about the phone number or a fax is difficult to validate in advance, because each company has its own spelling and a combination of characters and numbers can not be validated at the same time, such as: +49 (0)261 – XXX (which is rather common in Germany).
However, it is possible to validate the title, name, email, website and zip code.
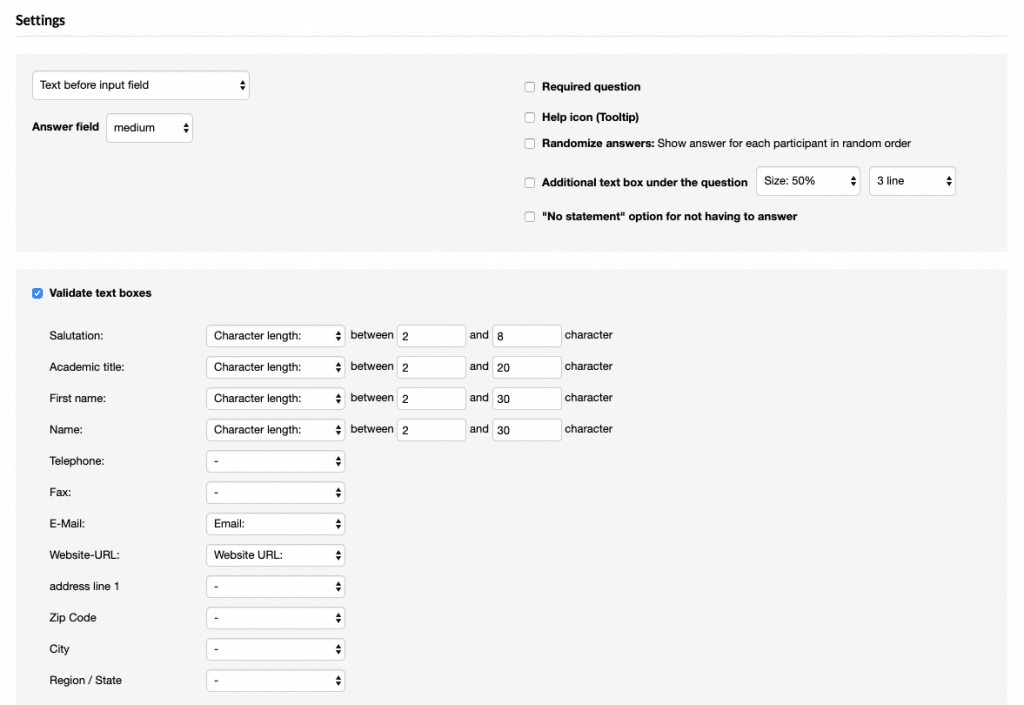
Don’t forget to click on Save. The question will now appear on the page, visible in the editor.
You could add further questions, which aren’t really needed in this example.
Final page
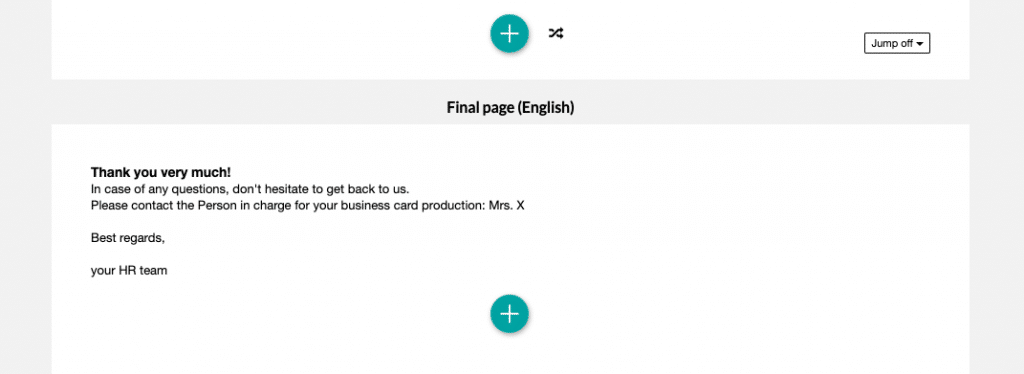
On the final page, you can now thank the participants and give them the opportunity to express their own questions or wishes. To do so, click on Edit at the “Placeholder text …” and replace it with something like this:
Thank you!
If you have any questions, please do not hesitate to contact us. Feel free to contact Ms. Chesterfield from the Human Resources Department personally, who will be happy to take care of your personal concerns.
Your personnel department
Create survey design
To give the survey an individual design, click Layout in the main menu at the top. Create a new design here.
Note: Currently, placeholders can only be transferred to text response questions in the classic design.
Once you have made all the settings, go back to the Overview, select your survey and open the Settings tab. In the Layout section, select your new layout and click Save Settings.
You can check the design on your survey by using the Preview in the upper right corner.
Import employee list
Next, click on “Participant Lists” at the very top of the main navigation and create a new participant list there. Once you are inside your new participant list, you can download an import template in the top section that is called “Import list of participants”.
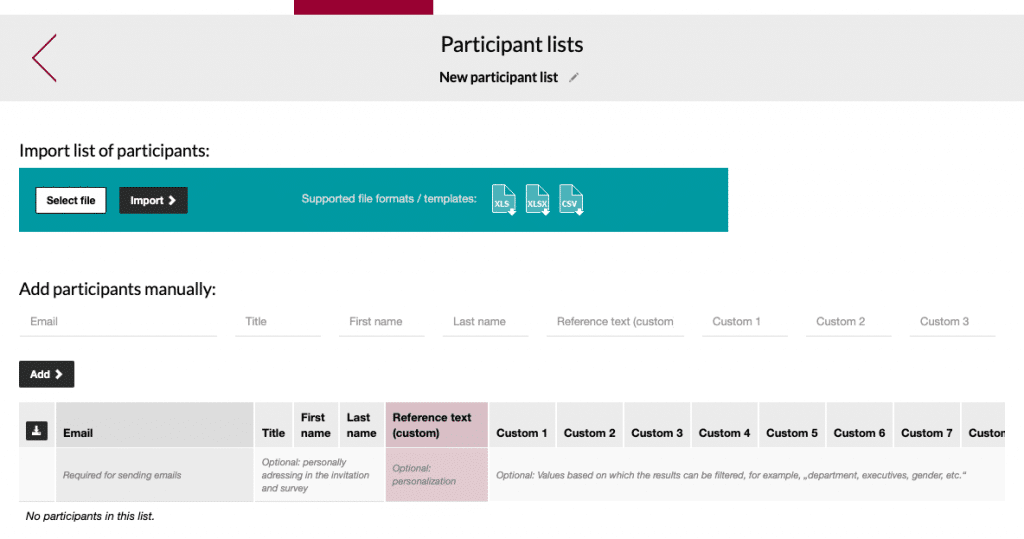
Note: All information that you now place in the participant list will become visible in the survey!
Once you downloaded the template, you can move the data into it. Please note, that the first column is set to have the email address. This format is mandatory for the system to process the invitations later.
Each line should look similar to the given example here:

Column A: Email
Column B: Title
Column C: First name
Column D: Last namess
Column E: Reference Text (not really necessary in this example, but very useful in case somebody needs a second invitation for a review)
Column F: Academic title
Column G: Phone
Column H: Fax
Column I: URL
Column J: No. and Street name
Column K: Zip, area code
Column L City
There is no need to fill in every column for each team member, except column A of course. All other missing ones can be left blank.
You can choose column headers as you wish. Our example shows enhanced instead of replaced headers. The reasons will become obvious later on.
Now that we completed our member list, we can import it by clicking Import.

Connect the data
To connect the data from the member list to the survey fields, we will need the original column numbers. If you deleted them by accident, you can just download the template again.
We will return to the questionnaire and the text response we edited. Time to click on Edit once again.
The connection with the member list data is performed by square brackets with the original column names. Example: [firstname]
Note: Please double check if you have an autocorrect function active in your browser, this often occurs with Safari.
The combination of square bracket and column name e.g. [lastname] will import the value from the list into the survey. We just need to do this once per column / field in the questionnaire. This way the data will be pre-entered for the participant to just correct it or simply click on sent.
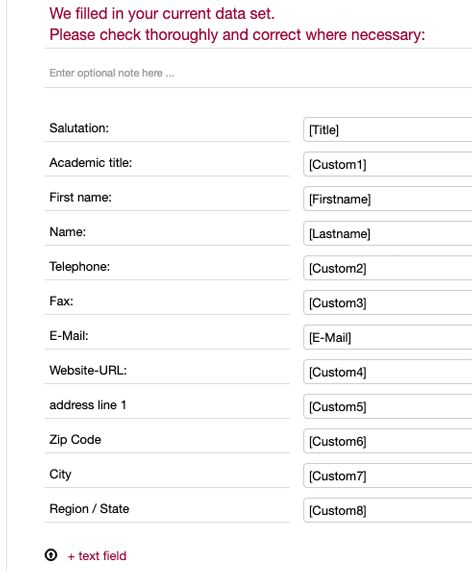
Note: Placeholders must be written with the original easyfeedback column label. Custom column labels are not accepted. Click on Save.
In order to now test the transfer of the data into the survey, you must invite yourself once via email invitation. The data will not be filled in via the survey preview because the assignment to the participant list is unknown to the system at this moment.
Email invitation
In your survey, click on the Invite participants tab and below that on Email invitations. On the left side, you now select your list of participants in the dropdown and add them to the survey:

On the right you will see the list name “Prepare business cards”. When you click on it, the email window opens. The sender information is included on the right, while the email text is entered on the left.
We give you an example to show how your invitation could look:
Hello [firstname] [lastname],
some relevant information for our business cards might change over time. We prepared a short form, where you can check what’s still correct and change what’s not.
Please follow the link below to access your individual business card data:
[Link]
When finished, please click „send“ to process the data.
In case of any questions don’t hesitate to contact us.
Best regards,
Your HR team
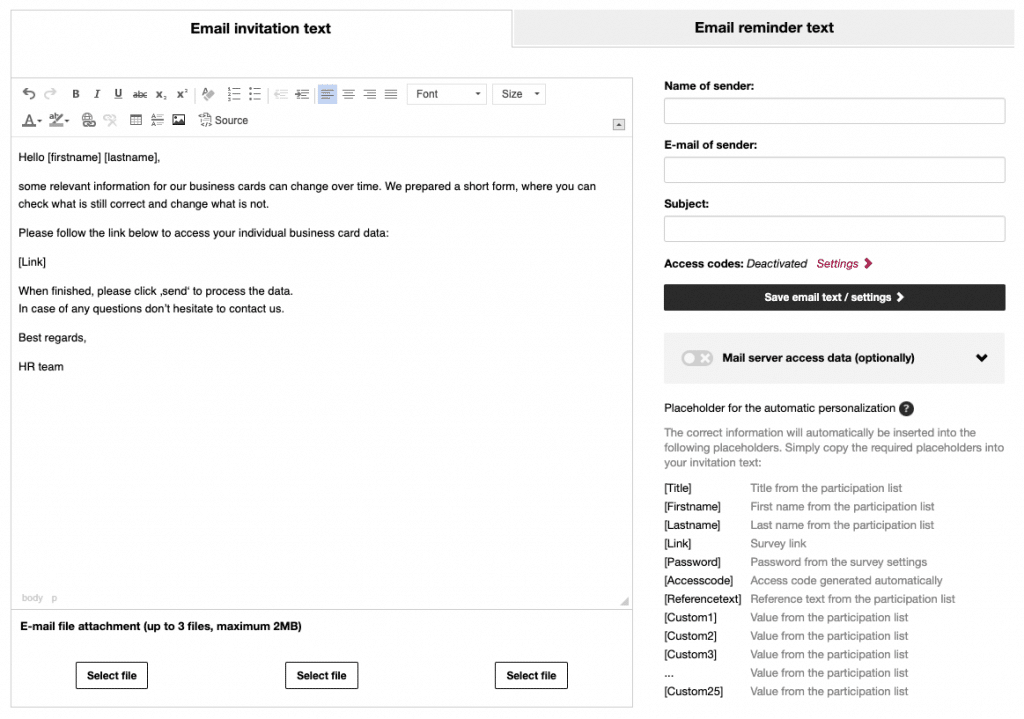
Just like before we can use the square brackets again. In this case we used them for the name in the first line and the link in the middle.
Note: The placeholder [Link] must remain exactly as it is. The link is automatically set by the easyfeedback system and links the data from the participant list to the survey.
Below the email invitation text field you will find the invitation options. At this point you can send out the invitation to the participants, after everything has been prepared.
Publish and test
The best way to check that everything is working well, is an invitation to ourselves.
To do so, the survey must first be published via the Publish survey button so that we can send out the invitations.

Note: After publishing you can still edit everything and make corrections if necessary.
To test the transfer of the data into the survey, we now invite ourselves.
In order to do so, click on Invite participants > Email invitations and once again click on the name of the participant list.
You now have two options for testing:
- You add yourself to the list with another email address.
- You invite yourself via the list, delete yourself from the participant list after the test and add yourself again afterwards.
In both cases, make sure that you enter all the data for yourself that is to be output in the survey.
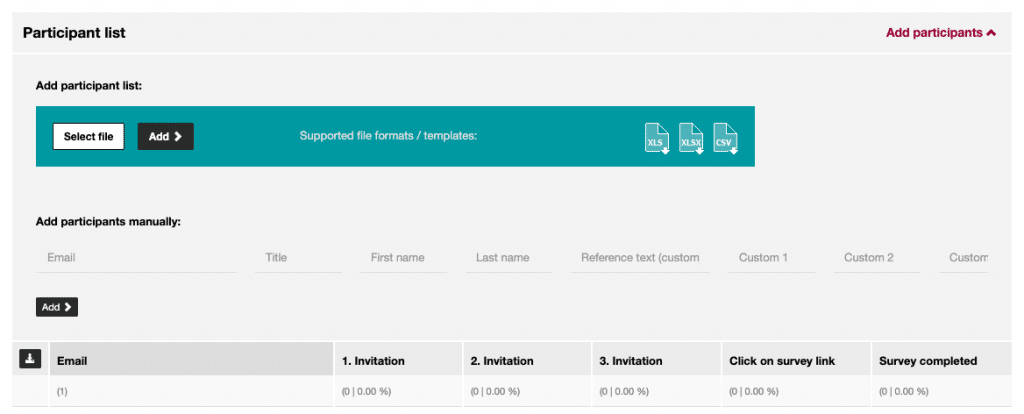
Either way, you can add participants later by scrolling down the participants list by clicking Add participants.
Send test invitation
To invite only yourself for the test, search for yourself in the participants list, activate the checkbox to the left of your email address and scroll up again to the “Send options”.
Now select the last option (5) and click on “Send invitations”. With the 5th send option, only the selected participants (in this case you) will be invited.
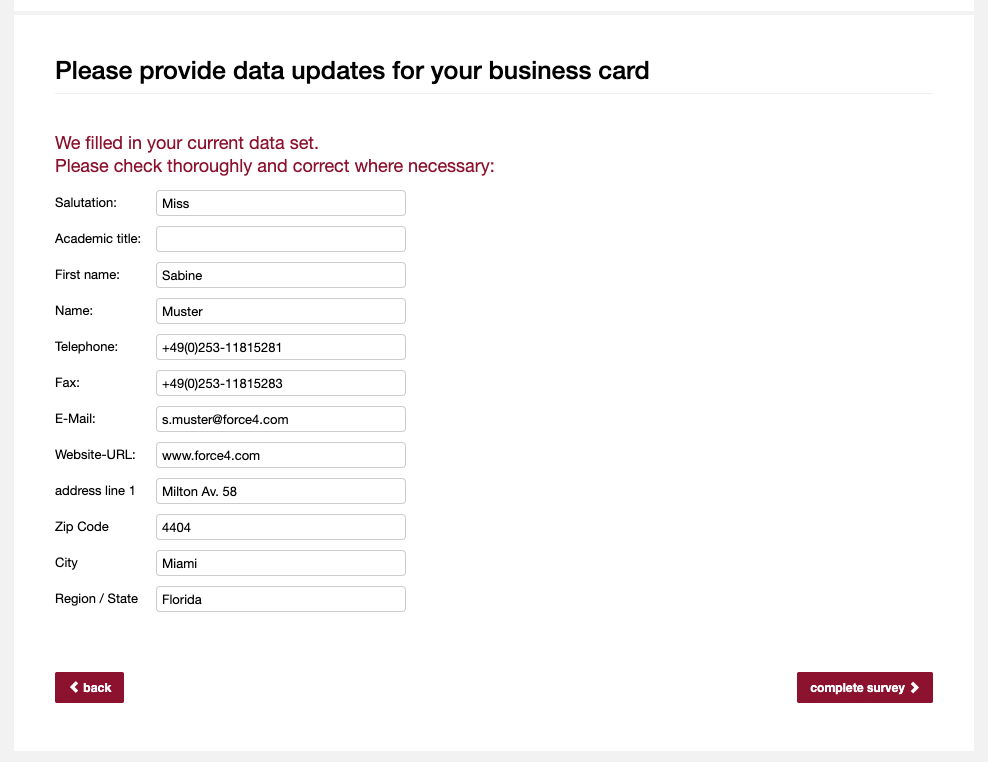
Now when you click on the link in the email invitation, the survey will open and you will see the data from the participant list in the survey:
Delete the test result
After the test we go to the tab „Evaluation“ and open „Single result“.
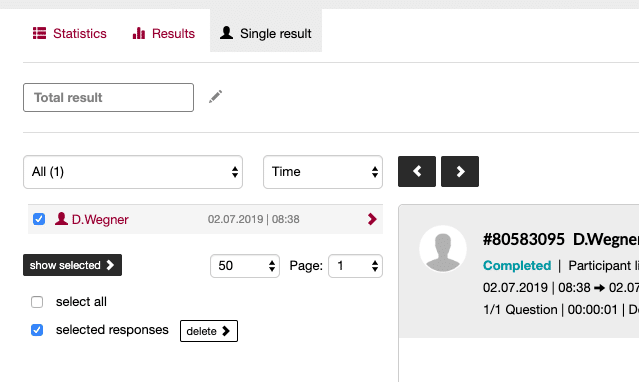
You will find your own participation in here. To clean up the test result, you can delete it now:
Click the checkbox left of your name and the „selected responses from the result“ checkbox on the bottom. Then hit „delete“.
Send out invitations
After these preparations, we can start to enter the real world and invite the participants. Get back to „Invite participants“, where you return to the participants list and scroll down to the „sending options“.Select the first option „Invite all participants from the list“ and click on „send invitations“.
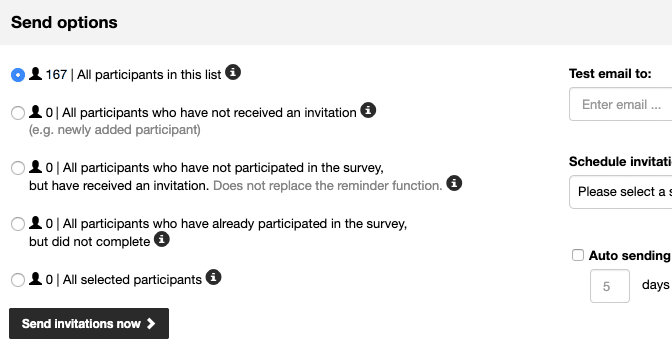
In case you want to add some more colleagues later on, you could use one of the other options (the second one). A reminder can be sent with the third and fourth options for the specified groups who didn’t react or complete.
Export results for your printing partner
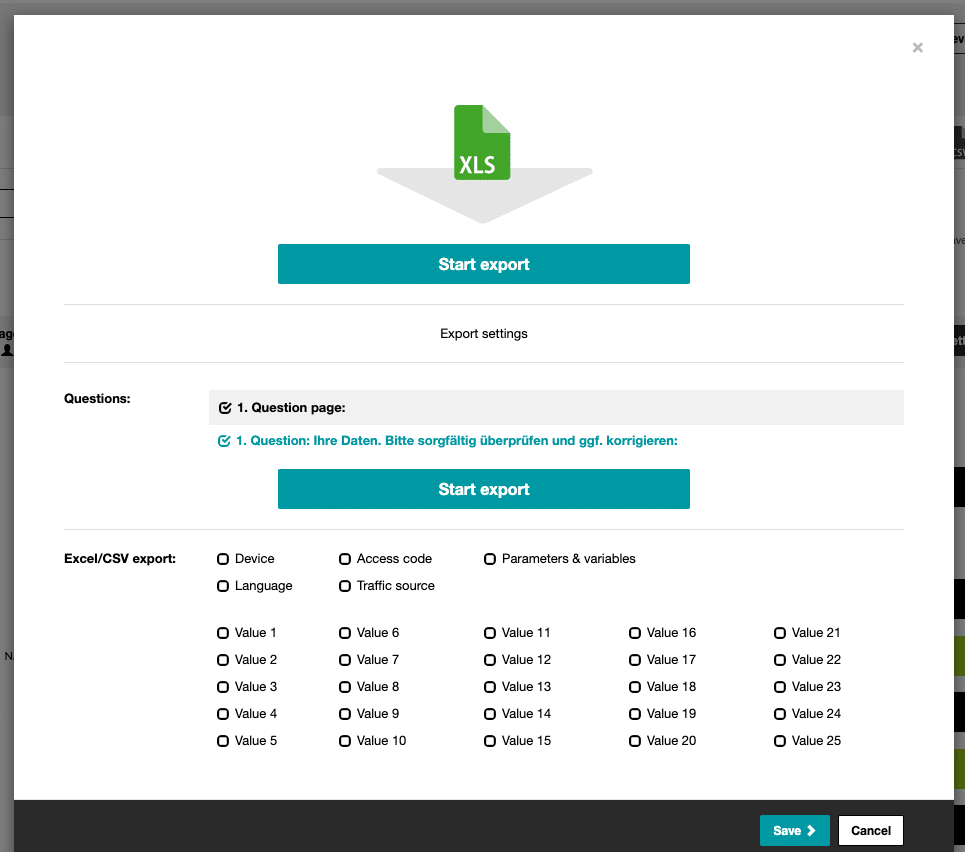
You can access the results even while the survey is running. Of course the results stay available after the chosen survey participation time, too. After the participants completed their checks and corrections, it is time to export the data sets. You can find this functionality in the „Evaluation‘ tab under ‚Results“.
On the top right you can click the export format icon to start an export. On the next page you can choose which data will be included in the export, by checking and unchecking the boxes for each value and other parameters. In this example we don’t really need the parameters like „Device‘ or ‚Traffic source“.

More about business cards:
