What does 360 degree feedback mean?
By 360 degrees, we ideally mean four perspectives from which feedback is obtained (90 degrees for each perspective). If one perspective is missing, this is referred to as 270 degrees of feedback, and if there are only two perspectives, this is referred to as 180 degrees of feedback.
The perspectives of a 360 degree feedback:
Perspective 1: Self-assessment of the manager
Perspective 2: External assessment from the manager’s perspective
Perspective 3: External assessment from the employee’s perspective (peers)
Perspective 4: External assessment from the customer/supplier’s perspective
The implementation of a successful 360 degree feedback with easyfeedback depends on three components: Questionnaire design, invitation management and the presentation of results.
In this tutorial we show you:
- Questionnaire structure and personalization
- Prepare participant list with individual perspectives
- Test questionnaire and send email invitations
- Evaluate using 360 degree reports
Questionnaire structure and personalization
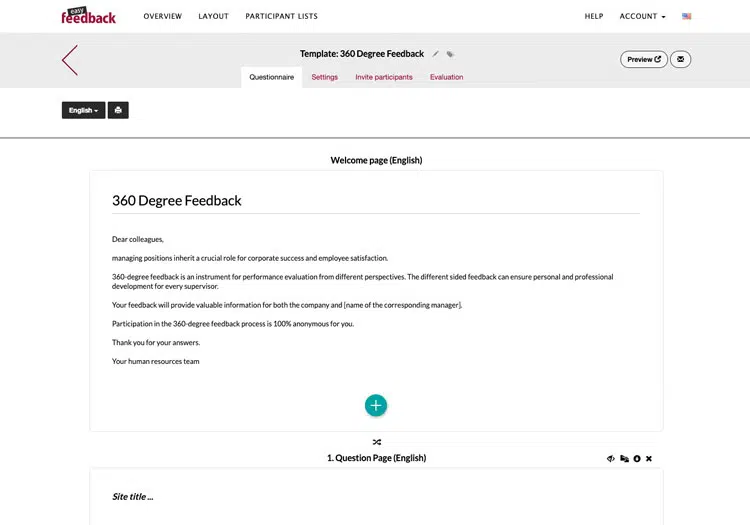
In order to receive 360 degree feedback, the questionnaire or survey must first be created. If you have already designed a questionnaire, you can transfer it to easyfeedback now, or you can use the 360 degree feedback template to create your individual questionnaire on this basis. The 360 degree feedback template from easyfeedback is available to you free of charge and can be individually adapted to your needs.
In both cases you create a new survey. To do so, click on + Create new survey in the Overview of your account.

Now you decide whether you want to start without templates and transfer your already designed questionnaire, or start with our provided template for 360 degree feedback:

Personalization
In order for managers and employees to know who they are assessing at all times, it is advantageous if each participation is personalized.
The personalization of the questionnaire takes place via placeholders that are automatically filled by the system. The corresponding information for the personalization is taken from the participant list and thus correctly assigned to the participant (manager or employee).
Within the participant list you can store as many details as you like, which you can display again in the questionnaire.
A predefined placeholder is: [Feedback person]
[Feedback person] is the placeholder for the person who will be assessed. You can insert the placeholder at any position in the questionnaire (survey title, page title, in a text element, within the question title or in the answer options).
It is important that the placeholder is always set with the square brackets, as shown in the following figures.

Besides the placeholder [Feedback-Person], you can also define and use others.
Placeholders, such as [Feedback-Person], can also be used in the email invitation to make it clear who is to be assessed as early as the invitation stage.
Side note: When testing, keep in mind that the placeholders are not filled in the survey preview, as the system does not yet have an assignment to any participant data here. You will learn how to test this below.
Prepare participant list with the perspectives
In the case of 360 degree feedback (four perspectives) or e.g. 270 degree feedback (three perspectives) it is important that the answers are assigned to the correct perspectives in order to be able to display a report including the individual perspectives later in the evaluation.
To make things easier for you at this point, easyfeedback offers you the necessary functions for precisely this area of application.
With the following steps you create a 360 degree list of participants including freely selectable perspectives.
1. Create new participant list
The basis is a participant list. Click on the Participant lists area at the top of the navigation and create a new participant list using the green + button.

In the next step, assign a name and click Create:

You will now get an empty list of participants. Next, click the green + button again and select Group:

Next, select 360 degree group:

And now assign a name for the 360 degree group. Next, select/define the number of perspectives. You can also decide whether the managers should give a self-assessment or not.
Give each perspective a name and create the 360 degree group:

After creation, you will see a gray box without participants. This is the first feedback round (executive to be assessed with the defined perspectives).
In this view you can now assign the participants to the correct perspective and add more executives via the green + button.
2. Add participants:
To add the participants, we recommend that you import them. It is best to create 3-4 participants as a test so that you can export them to an import template afterwards. Click on the green + button in the participant list and manually add some test data:


Now open your 360 degree group and add the test participants to the individual perspectives via the small + buttons:

After you have added the test participants, click on the export icon in the upper right corner and download the “Test setup” as an XLS file. You can now build and prepare your import file according to the scheme displayed there.
As soon as you are done with the preparations, you can import your file via the green + button.

A block is created in the XLS file for each manager to be assessed.
Notes:
- Be sure to name the perspectives correctly (no misspellings).
- The number of participants for each perspective is unlimited
- A participant can and may appear in different perspectives (duplicate)
- After the import, the assignment to the perspective can still be changed
Test questionnaire and email invitations
To be sure, you should start a test run and see if everything goes through as you expect.
To do so, it is best to create a second participant list with test participants. Repeat the previous step to create a new participant list with you and two to three colleagues. Once you have built the test list, click on your survey in the overview and switch to the Settings tab. Now activate your survey so that you can send the email invitations.

Now switch to the Invite participants tab and select Email Invitations.
Now use the + button to add your test list to the survey:
IMPORTANT: When selecting the participant list, you must also select the 360 degree group you created. Only if you select the 360 degree group, the assignment of the participants to the perspectives can take place.

Click on the list name to open the email invitations. Here you can now enter your sender information (name, email and subject line) and your invitation text.
At the bottom of the recipient list, you will see the test participants, including the perspective and for whom they are providing feedback.

Once you have made all the preparations here, select the first send option and send your test invitations:

Info:
It is possible that the emails will not be delivered to you, or will end up in the spam folder. In this case, you can authenticate the shipment via easyfeedback or choose a sender email address that is not identical to your company domain.
Now that all the test candidates have gone through, go into the evaluation and look at the result to test this area as well. This step is important. Because if you run your survey and find out at the end that something should be different, it will be a pain to correct manually. You will learn how to test the evaluation in the next section.
Notes
The test run is like the final version of the survey, but with test participants. To send the invitations and test the 360 degree report, you need an active business tariff, otherwise you will not be able to send invitations or open the 360 degree report.
As soon as the test is finished, you can delete the test results from the report to start with a cleaned result display.
Once you have completed your test, you can use the same steps to add your final list of participants to the survey and send out the invitations.
Evaluation via 360 degree reports
The great advantage of 360-degree feedback with the easyfeedback participant lists is the automatic report generation. Because you have already defined the individual perspectives per manager in the participant lists, a report is created for you in the evaluation on this basis.
As soon as the first people have participated, you switch to the Evaluation of your survey and open the Results tab.
Now open the 360 degree reports and select the name of the executive from whom you want to add a 360 degree report in the dropdown.

After adding, you will get a report with the perspectives you previously set:

You can now open the created reports as you wish, export them to the desired format or share them via link.
You can also edit or change filter settings (perspectives). For example, you could add another perspective “Overall result” if you want to compare the overall result with that of a manager.
More on 360 Degree Feedback: