If you want to use surveys to acquire new customers, you can send the data collected from an online questionnaire directly from easyfeedback to a customer relationship management tool of your choice and generate a new contact at the same time.
With the easyfeedback API and Zapier, you can automatically forward the results of your survey to over 2,000 of the most popular tools. And I’ll show you how this works using the CRM tool Hubspot as an example. I’ll use our quiz template for acquiring new customers, which is also available in easyfeedback, and show you how you can not only automatically forward the data to Hubspot, but also create a participant as a potential new lead in Hubspot at the same time.
You can also apply the steps I explain to you with Zapier and Hubspot to other questionnaires/quizzes.
Requirements for the instructions:
1. easyfeedback account
2. zapier account
3. Hubspot account
Procedure:
Create and activate the quiz with easyfeedback, create properties for the “Contact” object in Hubspot and set up the link between easyfeedback and Hubspot via Zapier.
Table of Contents:
A. Create and activate quiz in easyfeedback
B. Create properties for the “Contact” object in Hubspot
C. Connect quiz to Hubspot via Zapier
A. Create and activate quiz in easyfeedback
1. Log in
First, please log in to easyfeedback or if you don’t have an easyfeedback account yet, then you can create one here:
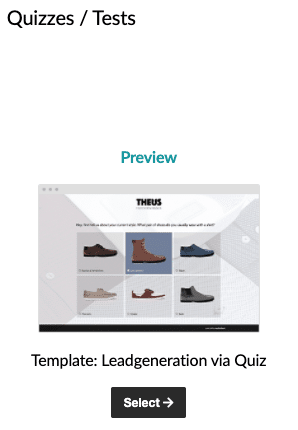
2. Select quiz template “Lead generation via Quiz”
After you have logged in to easyfeedback, click on “+ Create new survey“.

Select the quiz template for lead generation from the over 70 ready-made templates.
3. Activate quiz
After you have created the quiz template, go to the quiz questionnaire editor and activate it under “Settings“.

4. Take the quiz yourself
After activating the quiz you have to take part in it yourself once. This is necessary because you need at least one complete participation with results so that we can later configure the linking of the quiz with Hubspot via Zapier.
B. Create properties for the “Contact” object in Hubspot
In order for the data from the quiz to be transferred to Hubspot, appropriate properties for the “Contact” object must be defined and created in Hubspot. Only with these properties can the data be transferred from the quiz to Hubspot at the end.
First of all, we need to see which contact properties Hubspot already provides from the system and which ones we need additionally. What we need in addition also depends on what information we want to pass from the quiz to Hubspot.
Example:

In our lead generation quiz, we ask for the participant's first name, last name, and email address at the end of the quiz. Hubspot provides the first name, last name, and email as a contact property. Therefore, we do not need to recreate them.

However, what Hubspot does not provide as contact properties by default are the answers from the questions before, which are about asking the interests of the participants.
Let’s take the following example:
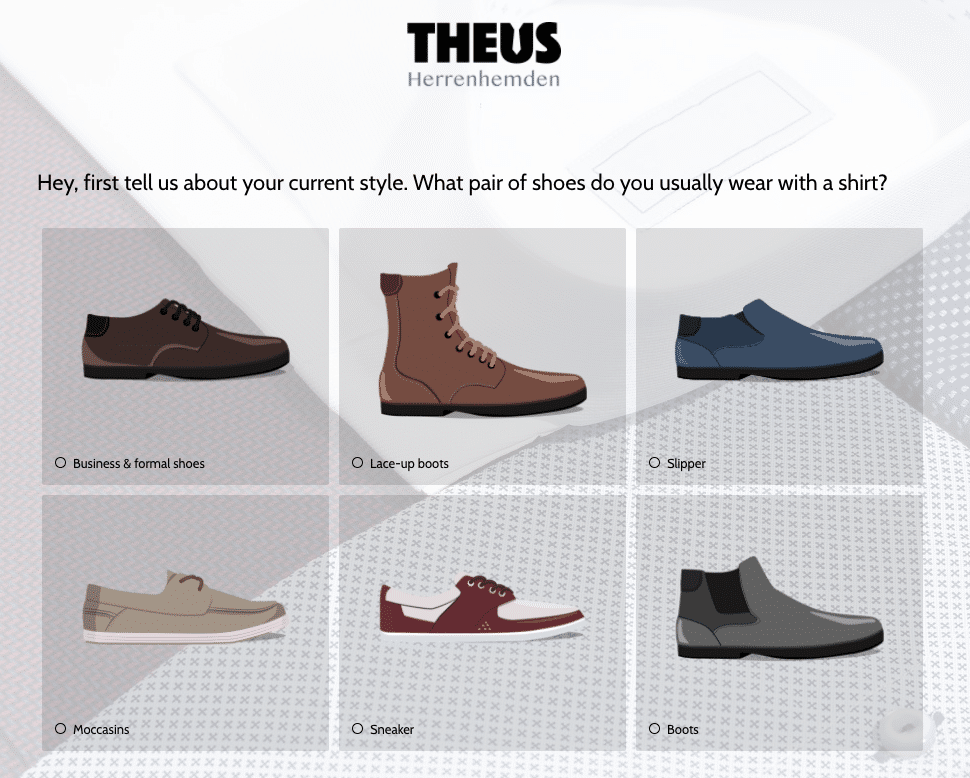
In order to pass the answer from this question to Hubspot and the new contact, we need to create a contact property ourselves with the appropriate field type in Hubspot. Otherwise, we will not be able to pass the answer that the subscriber selects here to Hubspot.
I will show how we can create a contact property ourselves in Hubspot below:
1. Open settings
In Hubspot, go to the settings. To do this, click on the gear icon in the upper right corner in Hubspot.

2. Open contact properties
In the settings, click on “Properties” on the left under data management.

3. Select object
In the properties, select the “Contact Properties” object.

4. Create contact property
Click on “Create property” on the right side.

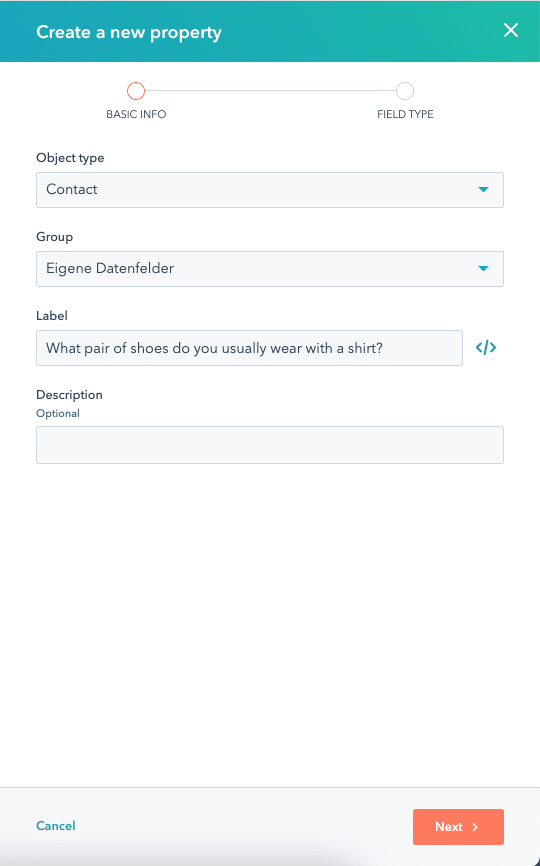
Select the “Contact” object type and the “Custom data fields” group. Label the object with the question from the quiz and click “Next“. Set the field type for the particular question.
In this example, I selected the question about the shoes that the participant usually wears with a shirt. To answer this question, the participant can choose from one of several answer options from a closed question. The answer from this question is a text response, which we will have overridden to a one-line text as the field type for the data field in Hubspot.
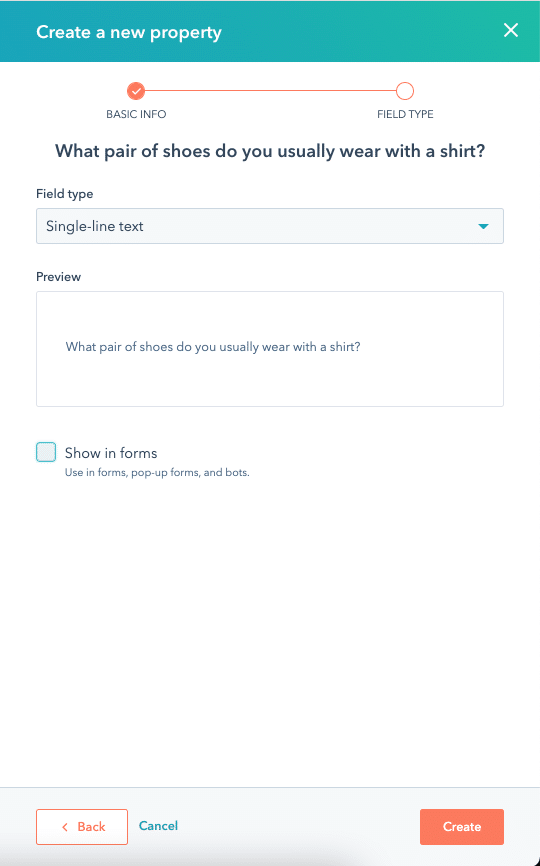
Then click on “Create” after you have set your new property.
Tip:

Repeat step 4 to create more contact properties to the other questions from the quiz in this way to transfer the results from the quiz into Hubspot.
C. Connect quiz to Hubspot via Zapier
After we have activated the quiz template for new customer acquisition in easyfeedback and created the required contact properties in Hubspot, the next thing we need to do is to configure the connection of easyfeedback with Hubspot via Zapier.
I will show you how this works below:
1. Connect easyfeedback with Zapier
Before you set up an automated workflow for data transfer with Zapier, you first need to connect your easyfeedback account with Zapier. To do this, open your account data in easyfeedback and click on the “Integration” tab.
Next, click on the “Connect Zapier” button.
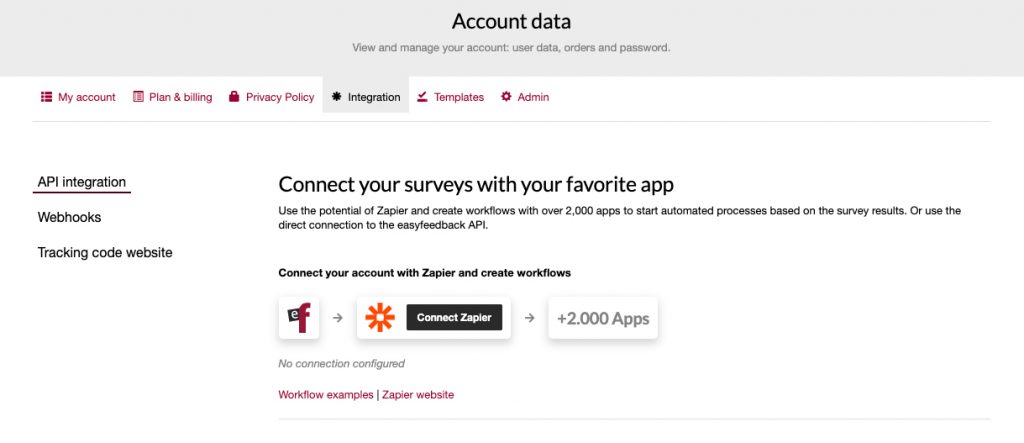
You will then be redirected to Zapier. Log in to Zapier with your account, or if you don’t have an account yet, create a new one. Follow the steps there to allow Zapier access to your easyfeedback account and connect the systems.
2. Create Zap and define workflow
Within Zapier, you can now create a “Zap” and use it to define the workflow/action. To do this, click on “Create Zap” and search for the easyfeedback app in Zapier:
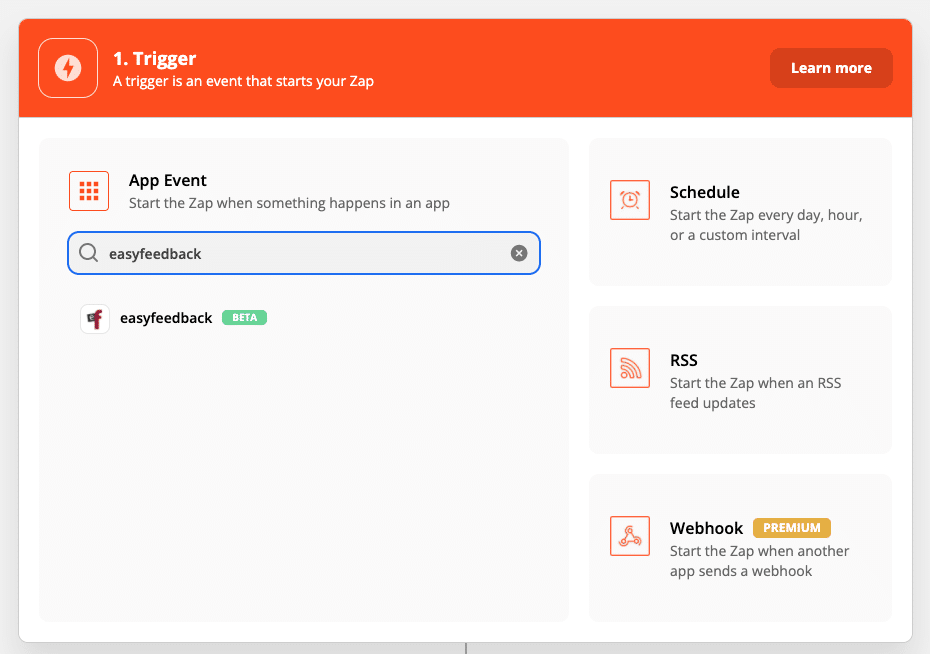
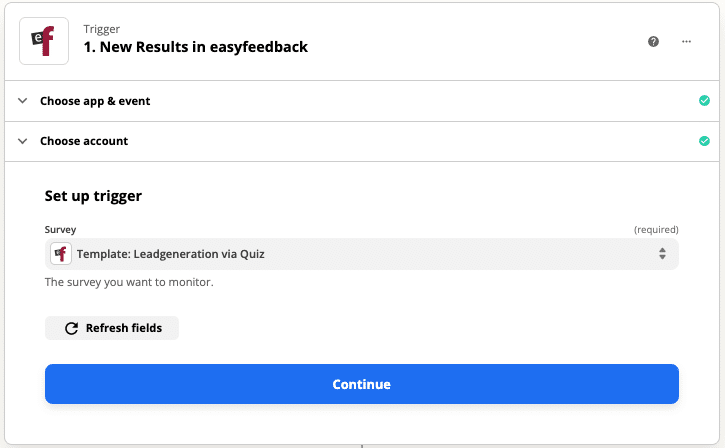
Next, select the trigger, i.e. the trigger of the workflow. To do this, select the trigger event “New Results“, then your easyfeedback account and finally the lead generation quiz:
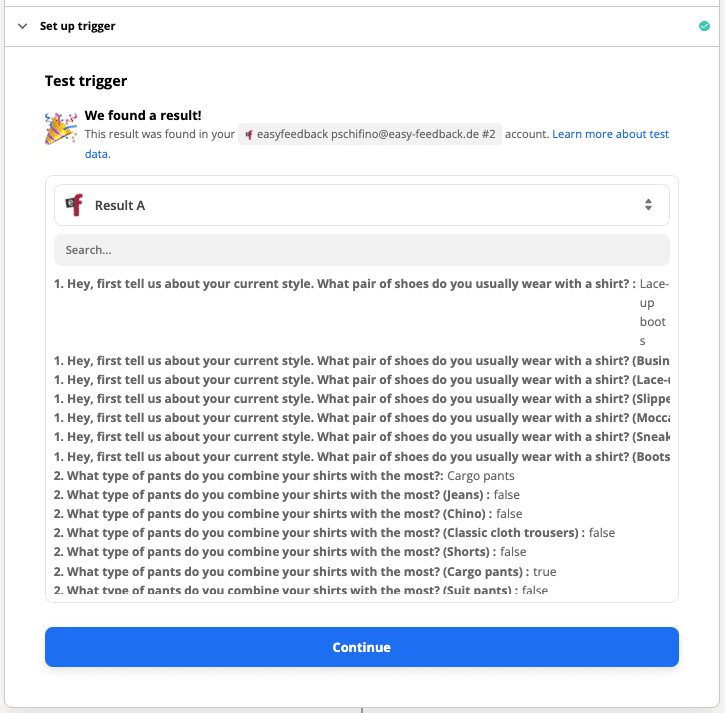
Afterwards, you only need to test the created trigger. The test of the trigger can only work if the quiz had at least one complete participation.
3. Define action
After you have tested the trigger, next define the action that should take place. To do this, select Hubspot as the app to send the data from the quiz to.
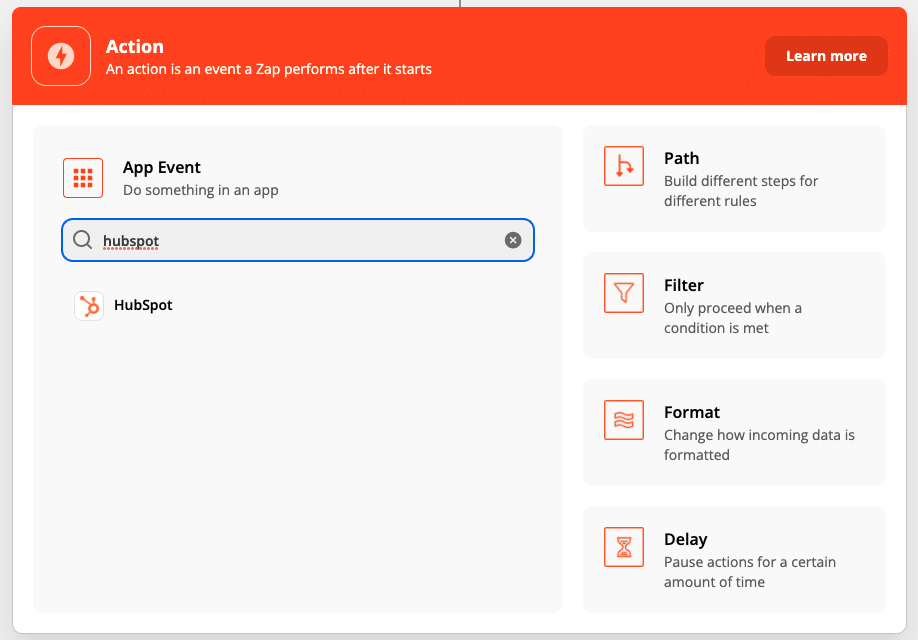
Once you’ve selected Hubspot as the app, select the action you want to happen in your app and connect the systems. As mentioned in the beginning, we want the participant of the quiz to be created as a new contact in Hubspot.
For this case, we need to select the “Create Contact” action.
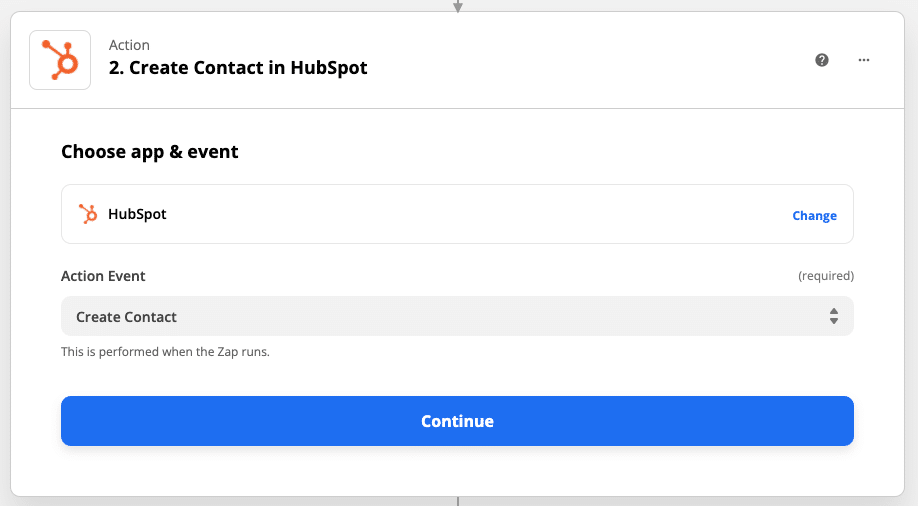
In the settings that follow, you can select the contact properties from Hubspot that you want Zapier to automatically populate when creating the new contact. For example, information such as first name, last name, email address, and the data fields we created about the answers from the questions in the quiz.
It is important that we have the answers written as plain text and not as boolean expressions (true/false) in the data field!
Below I have listed a few examples of how to fill Zapier’s contact property:


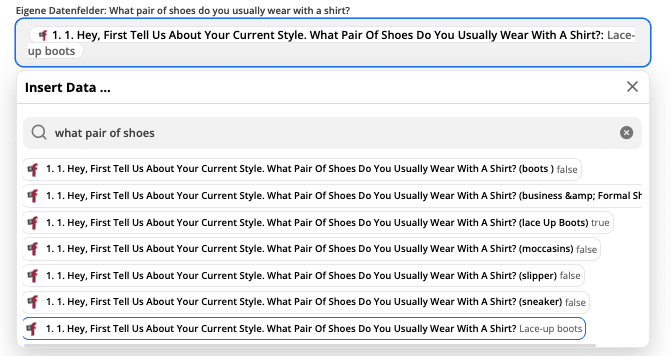
4. Test the connection
Once you have all the settings for Zapier to fill the contact property in Hubspot, the next step is to test the connection.
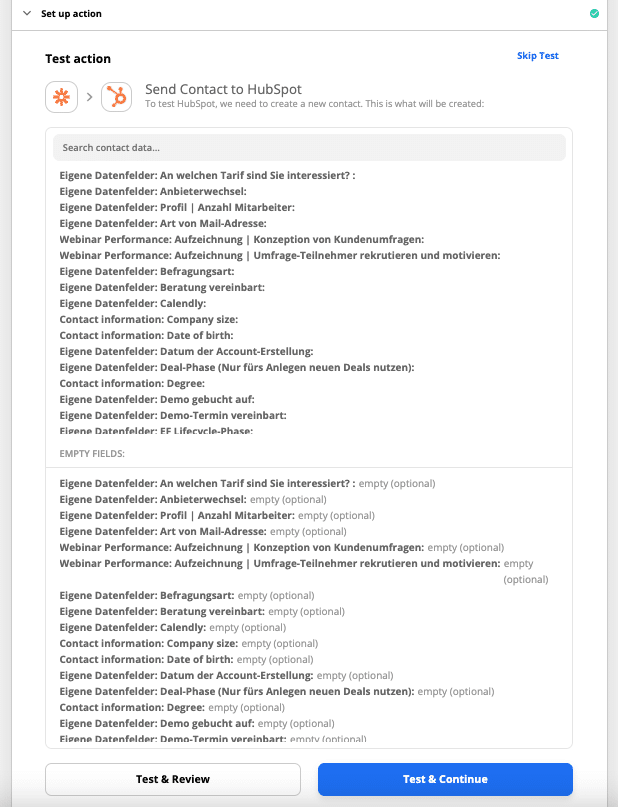
If the test was successful, then you will see in Hubspot under “Contacts” that the new contact was created with the information from the quiz.

You can also run the test again after activating the Zap by taking the lead generation quiz again yourself. Once the participation is complete, switch to Hubspot and check there if the desired action was executed.
If the action was not executed, first check in Zapier if the Zap was configured without error. If this is the case, look for the activity log on your Zap. From this, you can see if the Zap was activated by your test. Be aware of any “send limits or delays” within Zapier during your test.
More on lead generation:
