A pretest of surveys is a good way to test the questionnaire for comprehensibility and logic. This ensures that there are no errors and that you can send the survey to the participants with a clear conscience.
To perform a pretest you have two options:
1. Test the preview survey
The survey preview is identical in structure and functionality (e.g. filters, mandatory questions, etc.) to the real survey that you send later. You can recognize the preview by the green bar at the top of the screen. You can open the preview at any time and thus test the current status of the survey.
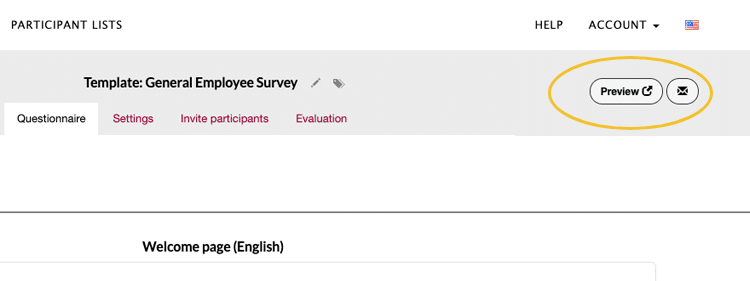
Simply click the Preview button in the upper right corner:
Additionally, you have the option to share the survey preview. Just click on the email icon next to the preview button.
Your email program will open automatically with a prescribed text and the link to the preview. All you have to do now is send the email.
ATTENTION: No results are saved within the survey preview. The preview is only a simulation of the survey. When inviting your participants, make sure that you do not use the preview link.
2. Test survey with results live
Alternatively, you can also perform the pretest live. In this case, results are saved and you can see how the results look in the evaluation.
At the end of the live test, you can delete the test results and start your survey with a cleaned result display.
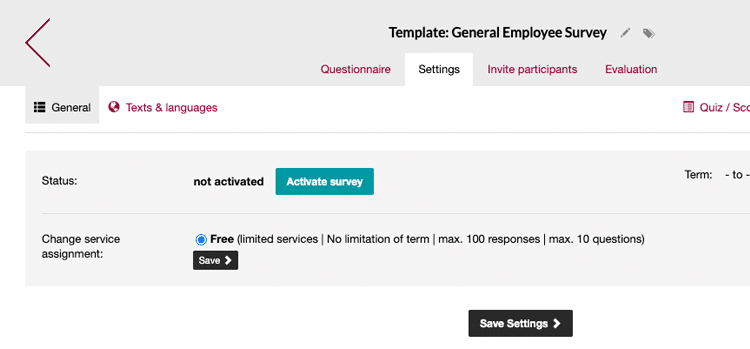
To run a pretest live, you must first activate the survey. No need to worry: After activating, you can continue to edit the entire questionnaire.
In order to do that, you need to open the survey settings and click the green Activate survey button:
Now switch to the Invite participants tab and select the invitation option you want to use to test the survey:

Now select the option with which you would like to carry out the pretest. For this purpose, easyfeedback offers you different options to invite the participants to the survey. The easiest and fastest option is to copy the survey link and send it to the participants for testing.
As soon as you have sent the survey link, you will receive the first results relatively quickly. Then simply switch to the evaluation. This is where you will see the results from the pretest.
Clean up survey results after the test
Once you have completed your pretest, simply delete the results from the evaluation in order to start your survey with a cleaned result display. To do so, you need to switch to the Evaluation tab and open the Single results:
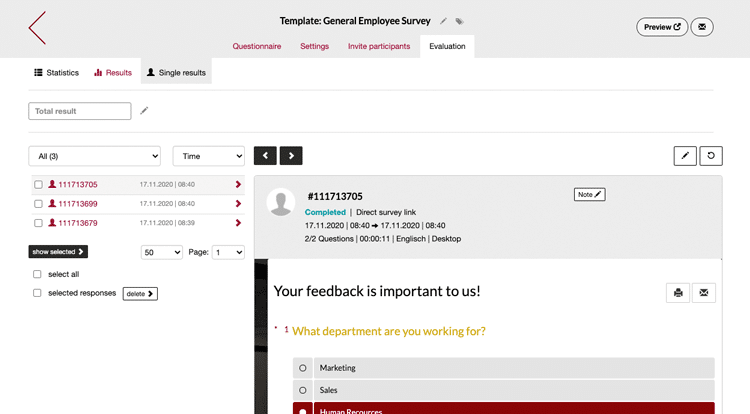
If you only want to delete individual results, select the corresponding checkbox next to the participant. If you want to delete all test results, then select “select all” via the checkbox.
Next, select the “selected responses” checkbox and click the delete > button.
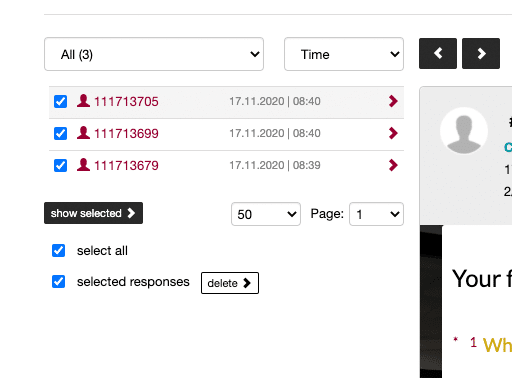
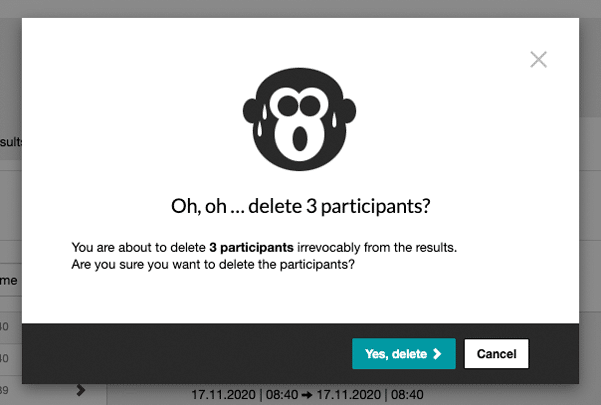
In the next step you will be informed once again about the deletion and the number of selected participants or results. Confirm the deletion to delete the participants or results:
