Login
First we create the questionnaire. To do so, please log in to easyfeedback. If you do not have an account yet, you can create one here:
Build questionnaire
Click on + Create new survey in the overview,

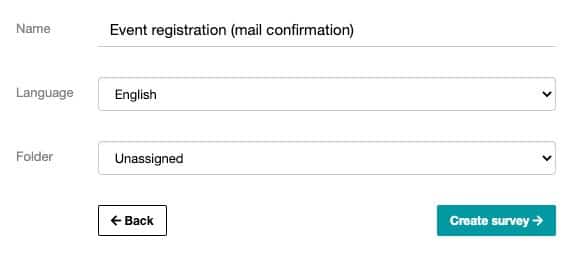
select Start without templates and assign a title for the survey: Event registration (mail confirmation) . Click on Create survey after.
The questionnaire editor of the new survey opens straight after and you get three predefined pages:
- Welcome page
- 1st question page
- Final page
Welcome page
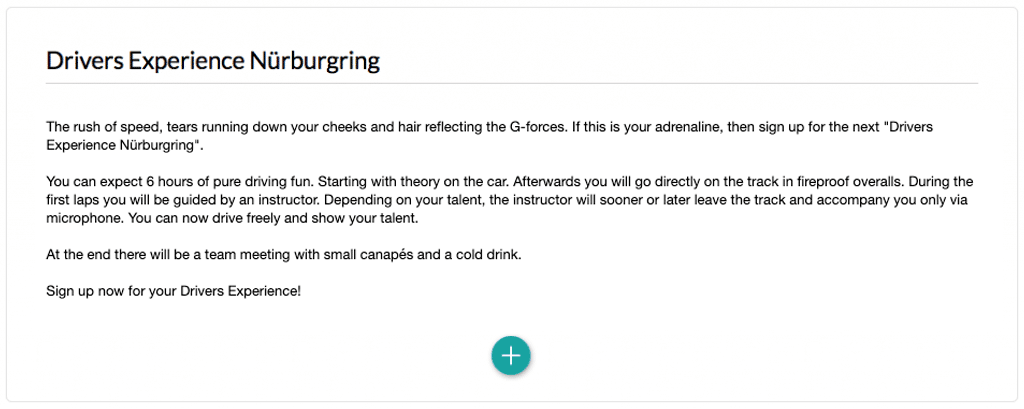
On the welcome page it is possible to give the participant a short info about the event. This will give the participant the feeling that he/she is confirmed to make the right registration . An example greeting could be formulated as follows:
Drivers Experience Nürburgring,
The rush of speed, tears running down your cheeks and hair reflecting the G-forces. If you want to feel the adrenaline, then sign up for the next “Drivers Experience Nürburgring”.
You can expect six hours of pure driving fun. Starting with theory on the car. Afterwards you will go directly on the track in fireproof overalls. During the first laps you will be guided by an instructor. Depending on your talent, the instructor will sooner or later leave the track and accompany you only via microphone. You can now drive by yourself and show your talent.
At the end there will be a team meeting with small canapés and a cold drink.
Sign up for your Drivers Experience now!
Above the welcome text you can set the title of the event. In this case the title could be as follows:
Drivers Experience Nürburgring
Question page
In order to receive the necessary data for the registration to the event, place the required questions in the questionnaire.
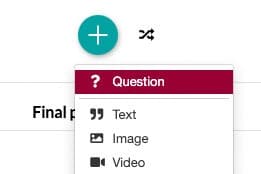
Click on the green + button at the bottom of the 1st question page and select Question.
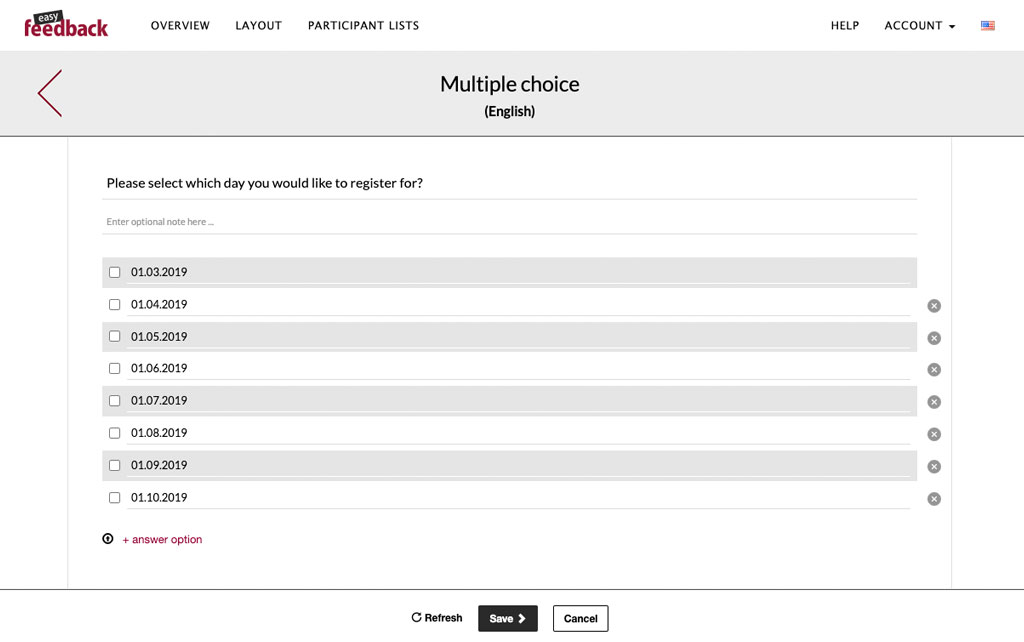
As the first question you select the Multiple choice question type as a dropdown to select the date for the event.
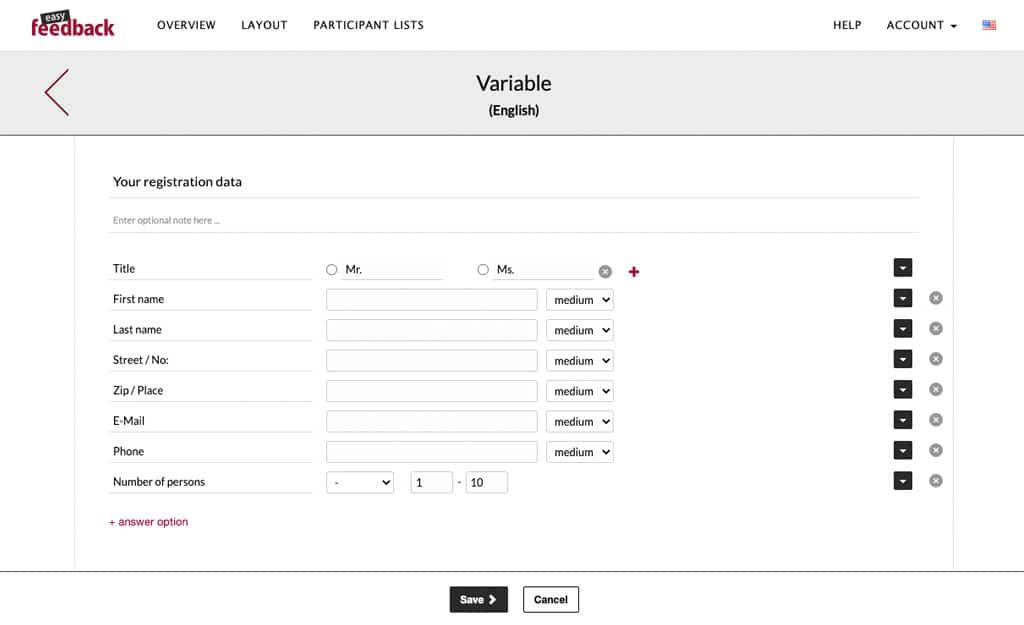
This is followed by the question type Variable to query the personal login data.
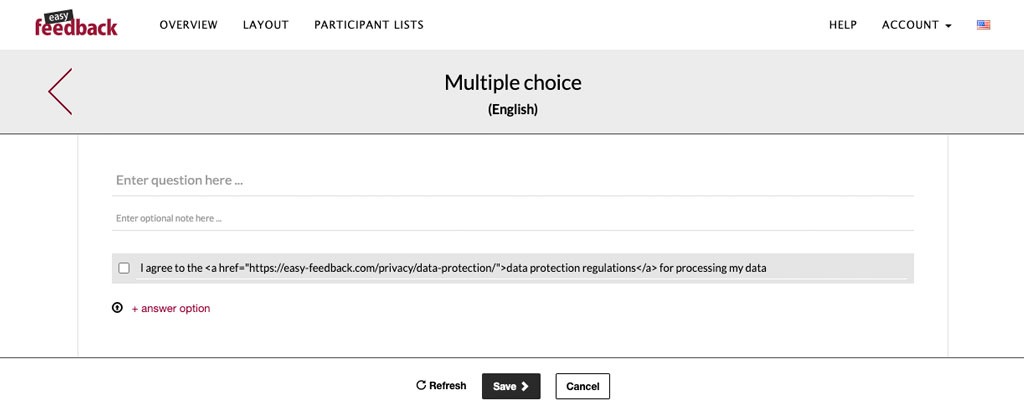
Finally, you need to give your consent to the processing of your personal data. To do so, select the Multiple choice question type with only one answer option and without a question title.
To make the consent mandatory for everyone, check the box Mandatory question.
You can respectively should now link part of the text to your privacy policy so that the participant can read it. To set a link, place HTML code with the target (website) before and after the text part. In our example it looks as follows:
I agree to the privacy policy for processing my data.
On the final page it’s time to say thank you and possibly enter information for inquiries. To do so, click on Edit where the “Placeholder text …” is and replace it.
You can always adjust the text and link as you wish.
Final page
On the final page you can enter a short confirmation and information about the next steps. By doing so you inform the participant about what has happened and what will follow next:
Thank you very much for your registration! As confirmation you will receive an email confirmation straight after. If you have not yet received the email, please also check your spam folder.
If you have any questions regarding registration and the further procedure of the Drivers Experience Nürburgring, please visit our website: www.event-page.de

Create survey design
To give the survey an individual design, click on Layout in the main menu above and create a new design.
Once you have made all your settings, go back to Overview, select your survey and open the Settings. In the Layout section, select your new layout and click on Save settings.
Use the preview in the upper right corner to check the design on your survey.
Configure confirmation email
Next, go to the survey settings and select the tab Email Response. Here we configure the automatic email response to the participants after the registration.
Via Status the automatic sending is activated or deactivated:

To use the email in the survey as recipient email, select Query within the survey in the first setting area, and then the question where you have queried the email.
Below that you can enter your individual sender information:

Once you have set the sender information, you can configure the email with subject line and text.
Within the email, you can personalize the text with the information from the survey. To do so, simply use the placeholders to use the participant’s answers (date, name, email, etc.):
[Q1 title] = Question title of question 1
[Q1-A2] = Only 2nd answer of question 1
[Q1] = All answers of question 1 (comma separated)

Your email text could then look like this:
Hello [Q2-A1] [Q2-A2] [Q2-A3],
thank you for your registration. Herewith we confirm your registration for the Drivers Experience Nürburgring:
Date: [Q1-A1]
Place: Nürburgring, Main grandstand entrance
Time: 09:00 am
If you have any questions, please do not hesitate to contact our team. Further information on the procedure can be found on our website: www.event-page.de
With kind regards
Drivers Experience Team
Publish and test
To test the registration including email confirmation, we go “live” through the survey ourselves and have an email sent to us.
To do this, the survey must first be published so that we can test the emails.
Switch to the Settings of the survey and click on Publish/Activate survey

Note: After publishing you can still edit everything and make corrections if necessary.
After publishing, go to the Invite participants section, copy the survey link and open it in a new window.

Now go through the registration process. The confirmation email will then be sent to the email address you entered.
PLEASE NOTE: The automatic email can only be sent if you have set the status to Active. If you do not receive an email, check whether the automatic emails are also active (status green).
Delete test result
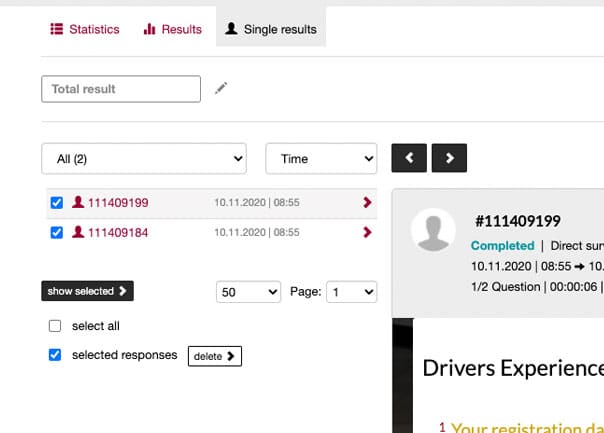
After you have completed the test, switch to the Evaluation tab of your survey and open Individual Results.
Here you see your participation and can delete yourself to clean up the results:
Select the checkbox to the left of your participation, additionally the checkbox selected responses and finally click delete >.
More on Forms & Events:
